

Want To Know More About Our New Stain Range?
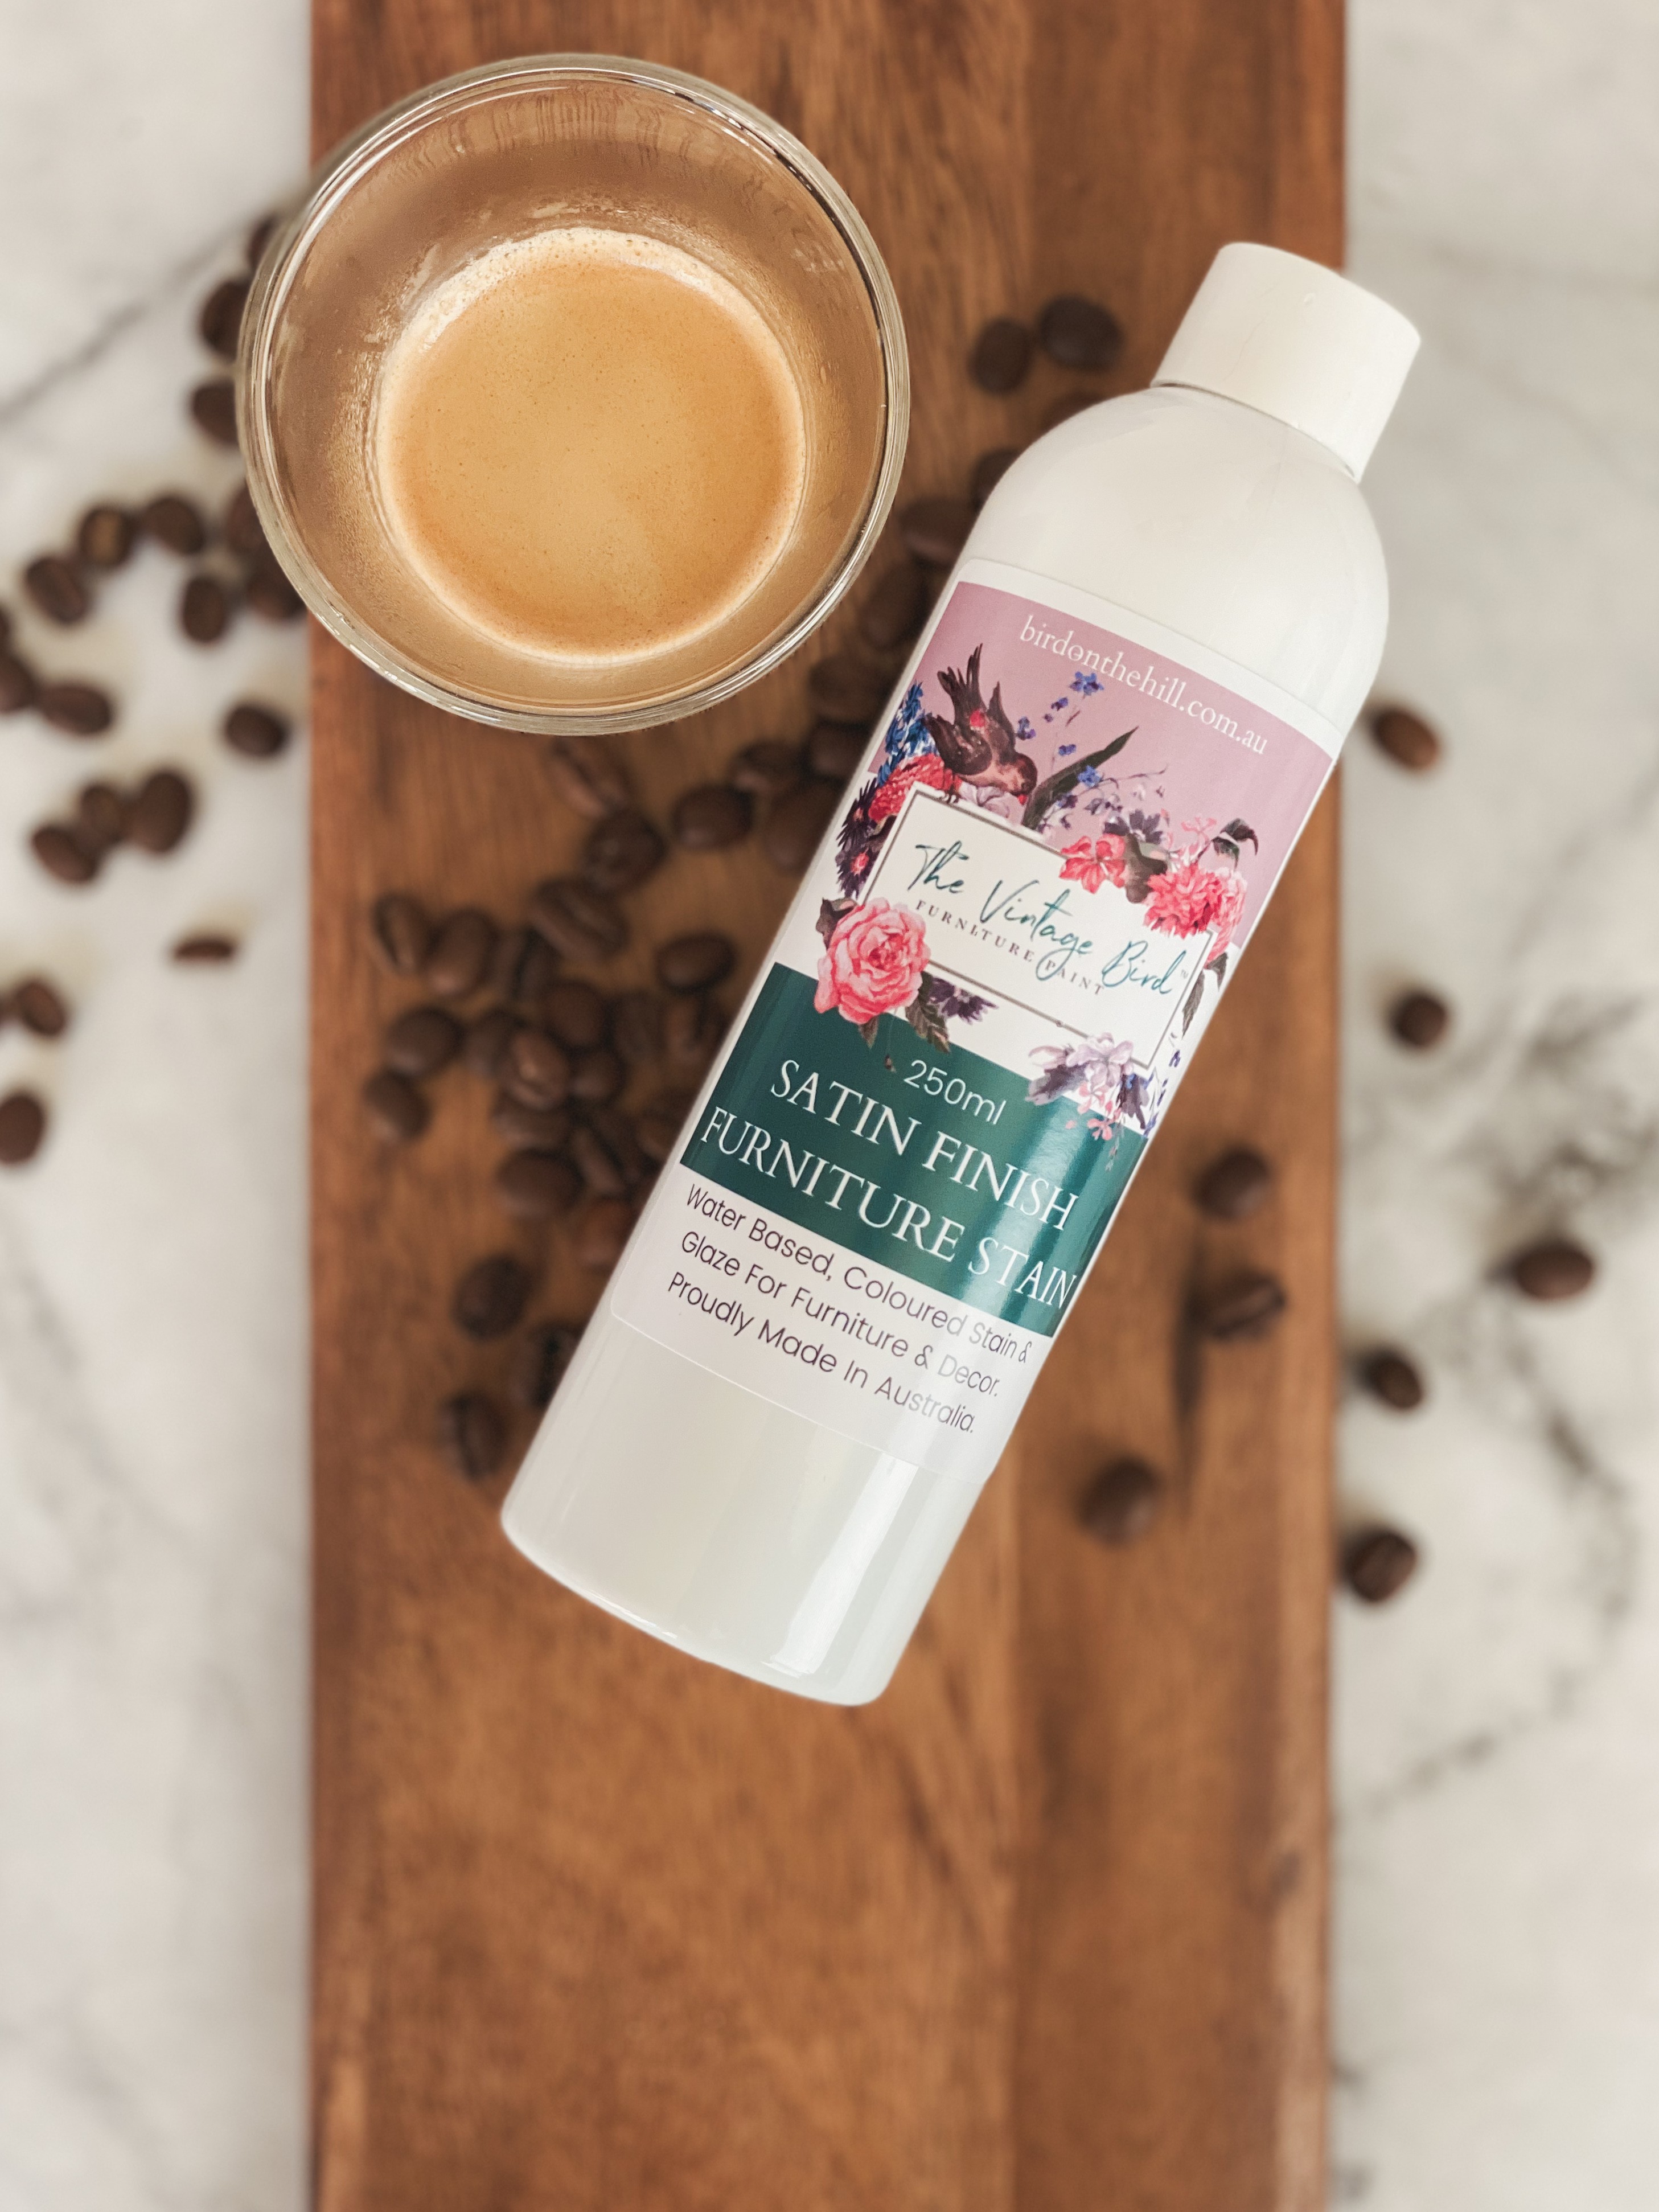
We're very excited to launch the new Vintage Bird Furniture Stain Range. It's been a long time in R&D, and we're thrilled with the results!
Read on to learn how to use our new stains, and find out why they should be your go to choice for adding a beautiful, natural stain colour to your up-cycling projects.
Five Shades Inspired By One Of Our Favourite Things...
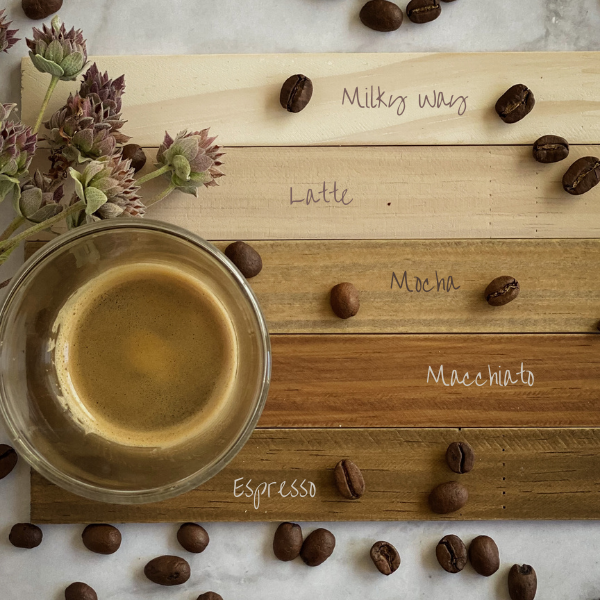
The team at Bird on the Hill are big coffee enthusiasts, so it wasn't hard to find colour inspiration for our new range.
We took note of the rich, earthy shades of coffee beans, and all the different ways we like to drink it and developed five coffee inspired colours.
There will be three more shades coming soon, so watch this space!

Our Top Tips For Using Stains In A Nutshell.
-
Start with a clean, smooth, and sanded surface
-
Gather all the equipment you will need: sponge/cloth, extra clean, damp cloths, extra fine sanding pad, Stain, Small bowl or cup for the stain.
-
Shake the bottle very well, and tip a small amount into your bowl.
-
Dip one edge of the cloth/sponge into the stain and wipe over your timber surface in smooth, long and consistent strokes working out towards, and off your edges. Complete until your surface is covered in the stain. Check of any inconsistencies while still wet and smooth over with your damp cloth.
-
Wait for a few hours to dry. Repeat if you wish after a gentle sanding of the newly stained surface. Two coats will give you great coverage and a durable finish with a gentle, satin sheen.
-
Our stains do wash off, but we recommend using disposable gloves when applying stain as it can discolour areas of dry skin, around cuticles, under nails etc... and take a day or two to fade.
Stain colours will vary from those pictured on our website according to the type of timber it is applied to. We recommend doing a small test patch somewhere inconspicuous first to ensure you're happy with the dried shade. Applying 2 to 3 coats of stain (sanding lighlty in between) will help to give you a more consistent finish and colour on old, dehydrated, or steaky timbers.
Here's Some Extra Info If It's Your First Time...
There are 3 main ways you can apply our stains to raw timber:
-
Use a dense, clean sponge that is just damp Apply the stain to one edge of the sponge so you don't overload it and waste stain. Wipe the sponge evenly in long strokes over the timber surface.
-
Apply with a clean, dampened microfibre cloth that will not shed any lint to leave debris on your stain surface. As with using a sponge, just dip half of the folded over square of cloth into the stain.
-
Use a good quality, fine nylon bristle brush that is exceptionally clean. You may find that brushing the stain on may leave more fine lines in the surface. If you're applying stain over a rougher surface, or the timber has knots and crevices, this may still be the preferred method, as cloths and sponges can get caught in the rough particles and leave debris. We recommend our Cling On! F40, S30, or S50 brushes for this task.
You can also use a small roller, you just need to ensure the roller has a nap that will give you a smooth finish. We recommend also ensuring the roller is just damp before applying the stain.
How to prepare your surface before you stain.
Thorough preparation is important to achieve a flawless finish. Here's our top tips for prepping:
-
Remove any existing stains, paint, varnishes, or waxes before you start. You can use a combination of a good quality, eco friendly paint stripper sand paper. If you have an electric sander (borrow or hire if you don't own one) it will make the job a lot quicker! Don't be tempted to use very course grit sandpaper to get it done quicker. You may end up with scratches in the surface of softer timbers that you will still see when you've finished. We usually start with a 120 or 180 grit depending on the type of timber. Then proceed with a finer grit like 240. It's preferable to then use a fine girt of 600 or above for a smooth finish. Our De-Glossing Sanding Pads are great for this task.
-
Once you've stripped and sanded, dust off any sanding residue and wipe over the surface with a clean, microfibre damp cloth. This will remove any fine dust, but also let you check that you have removed all of the pre-existing finish. If you can still see some discoloured areas, you will need to sand again as per the step above.
-
If you're getting little waxy balls, or grimy areas on your sand paper, it means that you may have a build up of wax, oils, or other grime on your surface. You can use white spirits to remove it, or a tspn of Vintage Bird Brush Gel dissolved in 1 litre of hot water and applied scrubbing with a nylon scouring pad. Using our Brush Gel concentrate is the fume free, safer way to do this, but you may need to repeat the process to ensure you have removed all the waxy build up.
The Fine Details
Here's a few extra little tips to help you get the perfect finish...
-
Don't overload your cloth/sponge/brush with too much stain, but have enough on there for it to glide along your surface, and not feel like it's dragging.
-
For flat surfaces like table tops, drawer fronts etc... start in the middle, wipe towards the edge and over it in one direction, then sweep back again in the other direction pulling the sponge over the opposite edge. Not sure what we mean? Take a look at the video above to see this technique. It will help to avoid a build up of stain close and along the edges making it dry blotchy and darker than the other areas.
-
Been too heavy handed? Don't worry. Keep baby wipes or a clean, damp sponge or cloth handy to gently wipe over the surface while the stain is still wet.
-
Want to apply more than one coat to deepen the colour, or give a little extra sheen? Sand in between coats with a very fine grit paper (our de-glossing sanding pads are perfect for this) and wipe over thoroughly. This will give you a smoother surface for your next coat.
Applying as a coloured glaze...
You can apply the stains as a glaze over existing surfaces to give them a deeper tone,s or and aged, vintage look. You just need to give the existing finish a scuff sand with fine grit paper before you start.
You can apply a dark colour over a lighter shade, or vice versa.
For example, Espresso gives instant shabby, vintage cred to lighter tones like Bone China and you can use Milky Way Stain as a wash over a deeper shade like Comfrey or Cape Town.
Shop the new
Furniture Stain range.
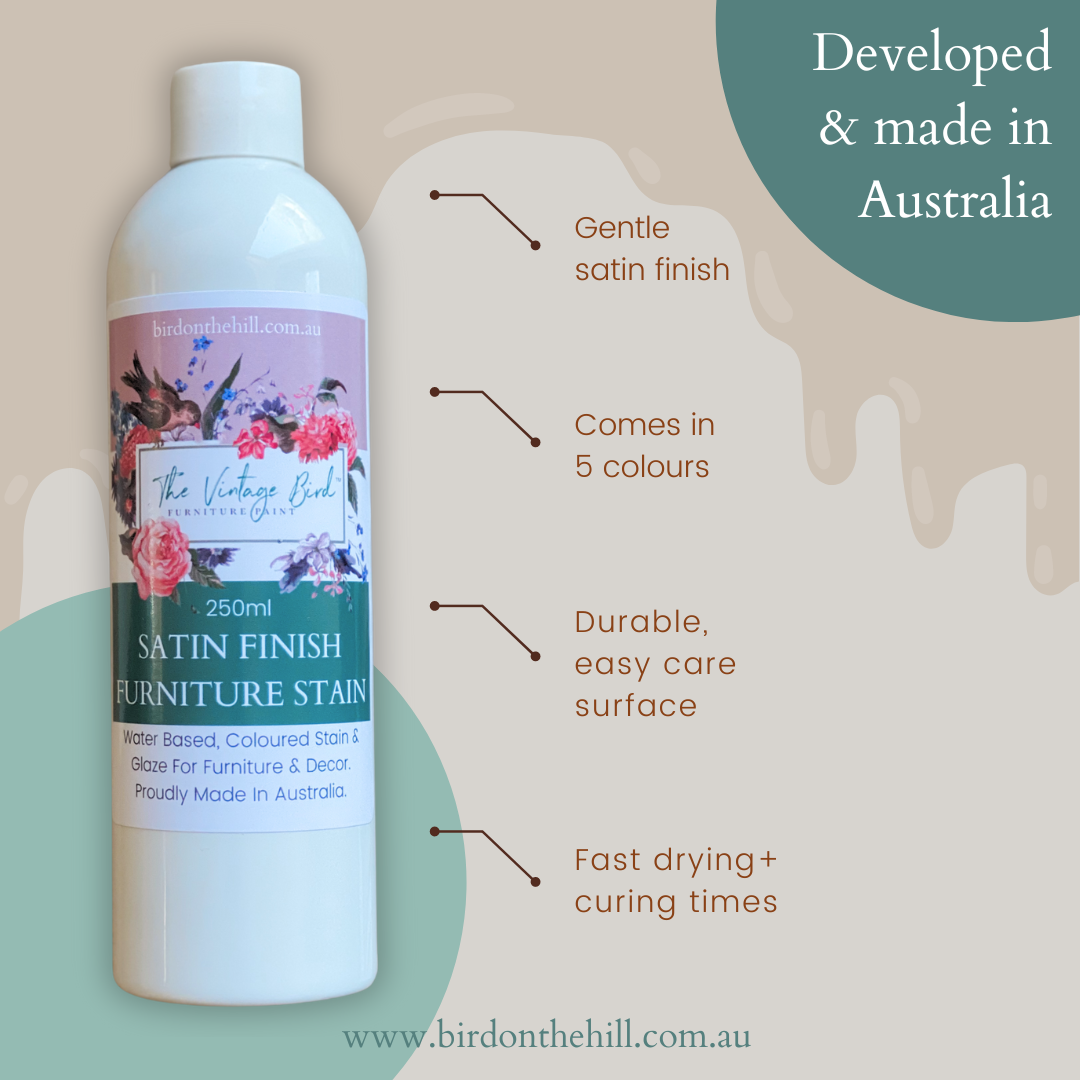
Five beautiful neutral shades. Designed to be easy to apply, and give a durable, moisture and scratch resistant finish.
Last of all...
-
Allow your stained surface to dry for 3 to 4 hours between coats.
-
Allow your surface to dry overnight before use. Stain is fully cured in approximately 8-10 days.
-
You can mix our stain colours to develop your own unique shade. Just write down your ratios in case you need to make more.
-
Wash your sponges, cups, brushes etc... in warm/hot water with detergent or our Vintage Bird Brush Cleaning Gel as soon as you're done.
-
Hand wash our de-glossing sanding pads to use for your next project.
-
Experiment and have fun - you'll learn something new, and improve your technique every time you try!
There are so many ways you can use Vintage Bird Furniture Stain. We hope you love them as much as we already do!
Would you like to read more handy how to and DIY tips?
Click here to check out all our previous blogs. You'll find everything from painting technique tips, help to work out how much paint you need, how to care for your brushes, and lots more!
New To Furniture Painting & Up-cycling?
Find our comprehensive range of products online - designed to help you makeover your furniture in 3 simple steps.
Join our VIP list to get first access to all our new blogs, products, and sales events.
Take 10% off your 1st order.
JOIN OUR PAINTING TRIBE
And let us welcome you with 10% off your 1st order, news about new
colours, product launches, early access to sales and more.