Ending up with very obvious brush strokes on yourpainted furniture...
It's the pits!
Seriously frustrating, not to mention very disappointing, after you have put so much work, effort, and time into restoring your piece.
You had a vision, right? A beautiful, smooth surface that feels like buttery silk!
I know that not everyone paints to achieve a super-smooth finish. Sometimes, we want to create deliberate texture to add interest and achieve a certain look. That’s great - I have seen some gorgeous pieces sporting a textured finish, but if you want smooth and don’t want to get to the end of your project realising that’s not the case, read on to find out my top five tips to help achieve a smoother, painted finish.

Tip number 1...
Start with as smooth and clean a surface as you can.
This doesn’t mean you have to sand every single thing you paint back to bare timber.
It does mean that if you have a surface with previous runs and drips, cracks, blisters, flaking paint etc... you are still going to notice this when you have finished painting your piece.This is especially true of trying to paint over old, damaged veneer or imperfect, bumpy surfaces that have been painted with oil and enamel based paints and varnishes.
So, even though you don’t need to sand your surface right back, you will need to sand well in the areas that there is pre-existing damage. If you have a veneered surface that is severely damaged, you may consider removing the veneer if you are certain that there is solid timber beneath, not just chipboard or ply. (Many of the deco and Queen Anne styles from early to mid last century had solid timber under the veneer tops). If you sand any surface of a pre-finished piece of furniture or decor back to bare timber, I would then recommend using a primer/sealer/undercoat to help minimise the risk of tannin bleed.
Tip number 2...
Choose your paint to match your piece (and the look you want to achieve)
A gorgeous, old, rustic and battered vintage piece is unlikely going to paint up to be beautifully smooth and sleek. Have a realistic expectation of what your finish will be like.
Remember, part of the joy of painting you own furniture (apart from the money it saves you and how easy it is) is creating your own, unique piece of art for your home. Your furniture is hand painted - it won’t and possibly, shouldn’t look like a mass produced, factory sprayed, chain store item.

That said, here is a basic guide when looking at the main types of furniture paint on the market in Australia.
Chalk Paint: not necessarily self levelling (depending on brand and consistency of paint)
Natural Milk Paint: Self levelling (unless prepared and applied very thickly.)
Acrylic based mineral paint:More self levelling than chalk paint and self sealing, so you don’t need to add a top coat of varnish to create even more brush strokes.
Vintage Bird Furniture Paint is an acrylic based mineral paint and makes achieving a smooth finish easier. Our Vintage Bird Milk Paint will also provide you with a beautiful smooth surface (maybe even more so), but does require sealing as it is porous once dry (like chalk paint). This can be done with Hemp Finishing Oil, Birds & Bees Clear Wax Paste, or a synthetic top coat.
Tip number 3...
Choose your tools wisely.
Can the type of brush you use really make that much difference when you paint? Simple answer - yes!
If you want to achieve a smooth finish, you will need a brush with long, synthetic bristles that is soft to the touch. Natural bristle brushes can be great for using with thicker paint like chalk paint, but not so useful for a brush stroke free surface.
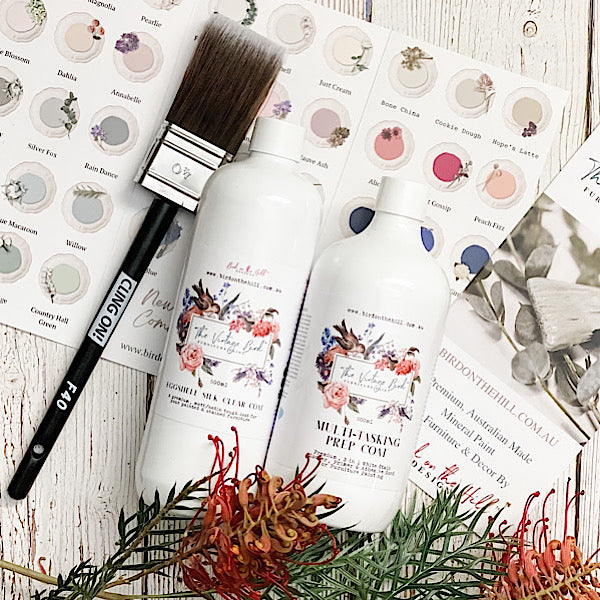
My favourite brand is Cling On! They are brushes designed by artists who love to paint furniture. The O35 and F40 Cling On’sare my favourites and will see you through many, many painting projects if cared for well. You can find our full range of Cling On! Brushes here.

Tip number 4...
Consider where and when you’re painting.
Extremes in temperature and weather conditions aren’t great for paint.
It’s important to store your paint in a stable environment - it shouldn’t get too hot or too cold. This means for the majority of Australian painters, that storing your unused paint in the outdoor shed or garage isn’t a great idea when outside conditions in much of the country reached over 40 degrees this past summer!
Also painting when it’s too hot or too cold will make your paint tacky, meaning it is more likely to pull and leave visible marks when dry, creating an uneven surface.
How do you know if it’s too hot, too cold or too humid? You will notice a difference in how the paint feels when you’re brushing across the surface. If you are getting some pull and the paint isn’t covering the tip of the brush evenly, that’s a good sign.
Tip number 5...
It’s all in the wrist (and the number of coats)
The way you apply the paint to your surface will help determine the finish.
For a smoother, hand painted finish, use long, light strokes and ensure that you DON’T overload your brush. Just dip the tip of your brush in the paint. If it starts to look like there is too much paint on there, and it’s building up closer to the ferrule (the part where the bristles join the base), then it’s a good idea to give your brush a thorough clean under warm soapy water with a good non toxic cleaner. The brush cleanerwe use at Bird on the Hill is made with a coconut oil base and is solvent free. Once clean and rinsed, spin your brush between the palms of your hands to remove excess moisture, and then you can get back to painting.
Applying three thin coats of paint will also aid in a smoother finish. It also helps to prevent chipping and cracking that can occur if the paint is applied too thickly. It may sound like more work, however our milk paint and mineral paint dry quickly, as does a thinner coat, and you can relax knowing that you are creating a more durable finish for your lovely new masterpiece!
You likely won’t use any more paint either - overloading your brush and applying it thickly to our surface will waste your paint, causing you to use more than needed.
If you desire an even smoother finish (or have a drip mark or two you need to make less obvious)?
You can wet sand your mineral or milk painted piece using our Hemp Finishing oil and a wet/dry grade sandpaper. It makes an AMAZING difference!
You can find detailed info about this process on my recent blog about all the reasons why I love using hemp oil so much. Click here to read.

So there you have it - secrets to achieving a smooth surface. Follow these tips and you will be painting like a professional furniture flipper in no time!
Happy Painting,
Corrina


