Do you have a collection of glass jars and bottles that you have been saving in the hope of up-cycling them into something pretty and useful? Maybe you have started thinking about table settings for a special occasion, such as a wedding, baby shower, special birthday etc… that you want to create some decor for?
Painting and applying transfers onto glass and tin is super easy, and a great way of adding some colour and interest.
There are a multitude of ways you can use paint and/or transfers.
Think up-cycled jars for kitchen pantry, bathroom, laundry and office storage, upgrade painted terracotta pots for indoor plants, coasters, placemats, tissue boxes, vases and the list goes on & on...
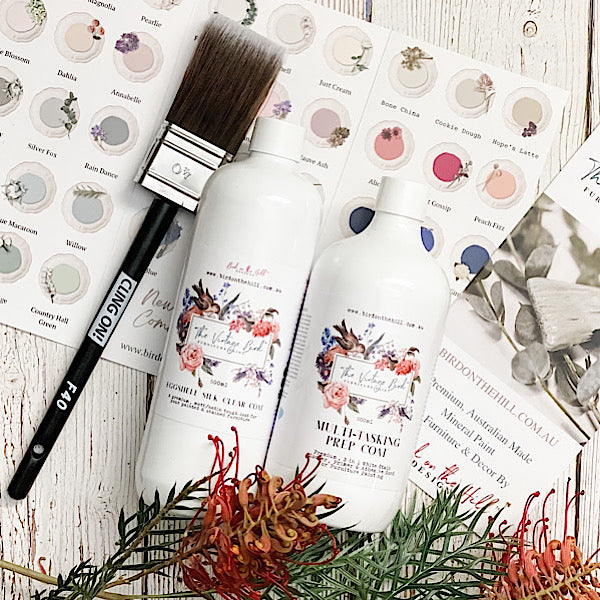
Mini Project Kits contain two paint colours, BSB, & two transfers.

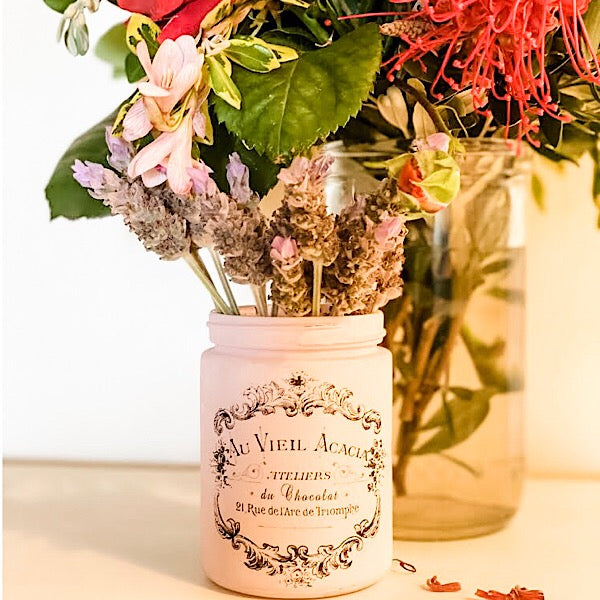
Using Vintage Bird Furniture Paint and transfers or stamps creates vintage appeal, and you can create your project with a few items in a couple of easy steps.
The waterslide transfers used in the photos here are quite delicate and need to be handled with care. You can find several tutorials if you check out related pins on Pinterest, but here is the way I apply waterslide transfers...
What you need...
Get your supplies ready before you start:
- Your jar, or other items that you want to work on. Make sure everything is very clean, and you have prepped your surfaces. (We use our B.S.B from priming & good adhesion)
- A shallow bowl half full with luke warm water.
- A towel to place on your work surface as the base.
- Sharp scissors or craft knife, suitable to cut around fine detail
- 2-4 double ended cotton tips
- A small, soft bristled paint brush (very clean)
- Birds Special Bond (BSB) or equivalent top coat/sealer.
- Paper towel.
Getting Ready...
Try to avoid any disruption while you are working on your transfers.Once you have placed them onto your surface they are very difficult to reposition, so you will need to concentrate!

Steps:
- Leave the white paper intact - this does not get removed until you are placing the transfer on your jar.
- Cut around the edges of your transfer to eliminate as much of the white space as possible without cutting into the design.
- Work out exactly where you want your transfer to go. I would suggest using a soft lead pencil and making very small marks where the centre of your transfer will sit, and the top and bottom edges. Just tiny dots, as once your transfer is in place, you won’t be able to remove these marks if they are under the transfer.
- Double check your surface is clean and smooth.
- Place your transfer into the bowl of water and place a few sheets of paper towel next to your bowl.
- Dip your paint brush tip into the water and place it next to your jar.
- Check your transfer is ready by very gently seeing if there is movement of the top layer whilst it’s still sitting in the water. If it slides a little without resistance, it’s ready.
- Take your transfer out of the bowl and place it paper side down on the paper towel for a moment to absorb extra water.
- Now for the tricky bit! The next few steps are where you will need to be concentrating and don’t rush - you need a steady hand...
- Handling the transfer very gently, place it on your jar in the location you have marked out.
- You can use blunt end tweezers, or your fingers for the next step - very gently slide the transparent top layer back to one side just a little. (Just enough to be able to hold the paper underneath)
- Keeping the paper in contact with the jar the whole time, very slowly and gently slide the paper out from under the transfer and set aside.
- Now working a little quicker, but still very gently, grab your wet brush and starting in the centre of your design and working out in a star shaped pattern brush the transfer down to push out any bubbles or wrinkles.
- If your transfer has crinkled at the edge anywhere, use one of your cotton tips dampened in water to very gently tease it out. Be aware that the transfer is very delicate whilst wet and will tear if too much pressure is applied.
- Dry your brush off a little so it’s just damp and gently brush over top again.
- Wait a couple of hours for the transfer to dry and then apply 1 to 2 coats of BSB (or other clear, matte, non yellowing sealer) over the top to protect the transfer.
- You can clean these items gently in warm water after being sealed, however they cannot be placed in dishwasher or rubbed vigorously with anything abrasive.
If you’re painting your jar (or other item) first:
- Ensure the jar is very clean (use isopropyl alcohol if required) and paint on a coat of BSB. Allow to dry thoroughly.
- Paint your base coat on VERY lightly. It doesn’t matter if it looks patchy - this is like your primer coat, so the lighter the better.
- Wait for paint to dry sufficiently between coats - this will take about 30-40 minutes.
- Apply two to three light coats until you have achieved desired coverage.
- Wait for the paint to dry - preferably overnight before applying your transfer.
- If you want the shabby, distressed look you will need to apply your dark colour first as described above and do two coats. Ensure adequate drying time and then apply two to three light coats of light colour. You can use a wax resist for this step if you like: just use your wax distressing block to lightly rub on the areas where you would like the contrast (think about where natural wear and tear may show. don’t over do it)
- When completely dry use a fine grade sand paper to gently distress back the top coats to show the dark areas underneath. Don’t forget to seal with BSB to ensure better moisture resistance so you can wipe over your surfaces to clean.
Our Mini Project Kits have everything you need for this project - 2 x 10ml bottles of mineral paint, a 120ml bottle of BSB, plus 2 waterslide transfers (Vintage French Typography style)
Achieve a pretty, vintage look like this canister by applying 2 coats of "Black Cat" as your base, and 2 coats of "Chalk White" to finish.

You can find our Mini Project Kits HERE
And our full range of Kits & Bundles HERE
Happy Painting xx


